即将要用到的物品(使用的版本号仅代表本文章编写的时候使用最新版本):
批量下载指令
1
2
3
4
5
6
7
wget https://github.com/openresty/lua-nginx-module/archive/refs/tags/v0.10.26.tar.gz \ https://github.com/openresty/lua-resty-core/archive/refs/tags/v0.1.28.tar.gz \ https://github.com/openresty/lua-resty-lrucache/archive/refs/tags/v0.13.tar.gz \ https://github.com/openresty/luajit2/archive/refs/tags/v2.1-20230410.1.tar.gz \ https://nginx.org/download/nginx-1.26.1.tar.gz \ https://github.com/vision5/ngx_devel_kit/archive/refs/tags/v0.3.3.tar.gz \ https://openresty.org/download/openresty-1.25.3.2.tar.gz
制造一个用于放安装源码的目录
1
2
sudo mkdir -p /opt/nginx-1.26.1/modules cd /opt/nginx-1.26.1/modules
将所有包解压(批量解压当前目录的gz文件)
1 find . -name "*.gz" -exec tar -xzf {} \;
安装必要的编译依赖
1
2
3
4
5
# ubuntu、debian sudo apt install build-essential libpcre3 libpcre3-dev libssl-dev zlib1g-dev # centos # sudo yum install pcre pcre-devel openssl openssl-devel zlib zlib-devel
安装openresty的luajit,并为luajit目录创建软链接
1
2
3
cd /opt/nginx-1.26.1/modules/luajit2-2.1-20230410.1 make -j4 && sudo make install PREFIX=/opt/luajit2-2.1 sudo ln -s /opt/luajit2-2.1/bin/luajit /usr/sbin/luajit
导入环境变量指定luajit
1
2
3
4
5
export LUAJIT_LIB=/opt/luajit2-2.1/lib export LUAJIT_INC=/opt/luajit2-2.1/include/luajit-2.1 # export LUA_INCDIR=/opt/luajit2-2.1/include/luajit-2.1
进入nginx源码目录, 使用编译选项(cd /opt/nginx-1.26.1/modules/nginx-1.26.1)
1
2
3
4
5
6
7
8
9
10
11
12
13
14
15
16
17
18
19
20
21
22
23
24
25
26
27
28
29
30
31
32
33
sudo -E ./configure --prefix=/opt/nginx-1.26.1 \ --user=www \ --group=www \ --with-pcre \ --with-compat \ --with-file-aio \ --with-threads \ --with-http_addition_module \ --with-http_auth_request_module \ --with-http_dav_module \ --with-http_flv_module \ --with-http_gunzip_module \ --with-http_gzip_static_module \ --with-http_mp4_module \ --with-http_random_index_module \ --with-http_realip_module \ --with-http_secure_link_module \ --with-http_slice_module \ --with-http_ssl_module \ --with-http_stub_status_module \ --with-http_sub_module \ --with-http_v2_module \ --with-http_v3_module \ --with-mail \ --with-mail_ssl_module \ --with-stream \ --with-stream_realip_module \ --with-stream_ssl_module \ --with-stream_ssl_preread_module \ --with-ld-opt="-lpcre -Wl,-rpath,/opt/luajit2-2.1/lib" \ --with-http_v2_module \ --add-module=/opt/nginx-1.26.1/modules/ngx_devel_kit-0.3.3 \ --add-module=/opt/nginx-1.26.1/modules/lua-nginx-module-0.10.26
编译安装
1
2
3
# 多线程编译安装 make -j4 && make install sudo ln -s /opt/nginx-1.26.1/sbin/nginx /usr/sbin/nginx
安装resty-core和resty-lrucache
1
2
3
4
cd ../lua-resty-core-0.1.28 sudo make install PREFIX=/opt/nginx-1.26.1/modules/lua-resty-core-and-lrucache cd ../lua-resty-lrucache-0.13 sudo make install PREFIX=/opt/nginx-1.26.1/modules/lua-resty-core-and-lrucache
(可选)添加用户和组’www’
1
2
3
4
5
6
7
8
sudo groupadd www sudo useradd -g www -s /sbin/nologin www sudo chown -R www:www /opt/nginx-1.26.1 sudo chmod -R 775 /opt/nginx-1.26.1 sudo usermod -aG www $(whoami) # 立即重新加载www组的信息 newgrp www
去修改nignx的conf文件进行测试
1 cd /opt/nginx-1.26.1/conf && sudo vim nginx.conf
在http块中添加
1 lua_package_path "/opt/nginx-1.26.1/modules/lua-resty-core-and-lrucache/lib/lua/?.lua;;" ;
在server块中添加一个实验块
1
2
3
4
5
6
location = /hello { default_type text/plain; content_by_lua_block { ngx.say("hello") } }
添加service
1 sudo vim /usr/lib/systemd/system/nginx.service
在没有特别指定的情况下, nginx会将自己的pid文件放在自己的安装目录(也就是编译安装时的PREFIX指定的目录, 如果不指定PREFIX, 则默认值为/usr/local/nginx)的logs文件夹中, 请注意下面的nginx.service文件内容中对于nginx.pid位置的修改
1
2
3
4
5
6
7
8
9
10
11
12
13
14
15
[Unit] Description =nginx - high performance web serverDocumentation =https://nginx.org/en/docs/After =network-on line.target remote-fs.target nss-lookup.targetWants =network-on line.target[Service] Type =forkingPIDFile =/opt/nginx-1.26 .1 /logs/nginx.pidExecStart =/usr/sbin/nginx -c /etc/nginx/nginx.confExecReload =/bin/sh -c "/bin/kill -s HUP $(/bin/cat /opt/nginx-1.26.1/logs/nginx.pid)" ExecStop =/bin/sh -c "/bin/kill -s TERM $(/bin/cat /opt/nginx-1.26.1/logs/nginx.pid)" [Install] WantedBy =multi-user.target
使用systemctl启动nginx
1
2
3
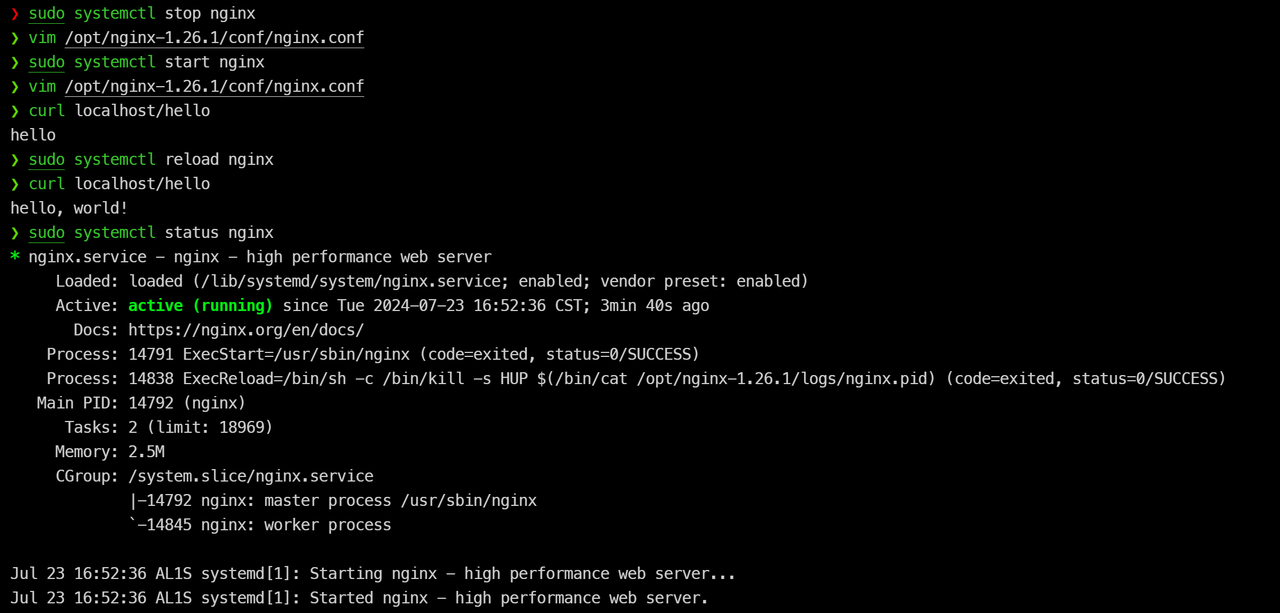
sudo systemctl enable nginx sudo systemctl start nginx curl localhost/hello
你应该看到返回hello
现在, 你可以使用systemctl管理nginx


